Backing up your iOS devices… it’s not a very sexy topic to discuss in the wonderful realm of Apple and our devices, but it’s incredibly important!
Now there are a million different ways to back up all your different Apple devices including via iCloud, external HDD, 3rd party apps and services, Time Machine etc etc. Today we’re going to be focusing on backing up your iPhone / iPad / iPod and why you absolutely need a backup plan!
Why should I have a backup plan?
Lets face it… you’ve spent countless hours painstakingly handcrafting, lighting, adjusting and editing your numerous and very important selfies and food photos – if a disaster strikes, don’t let that all be for nothing! Backing up via the cloud or computer means you will not only have access to these precious memories forever, but protects you and your data in any number of circumstances. If you need to take your device in to be repaired, you accidentally drop your phone in water or maybe your laptop goes Sumsung Galaxy 7 on you and explodes. Whatever the case may be, you know that your data is safe, saved and recoverable in more than one location, which will allow you to safely restore all your device settings, information, contacts etc.
How to back up with iCloud
1. Connect your device to a Wi-Fi network.
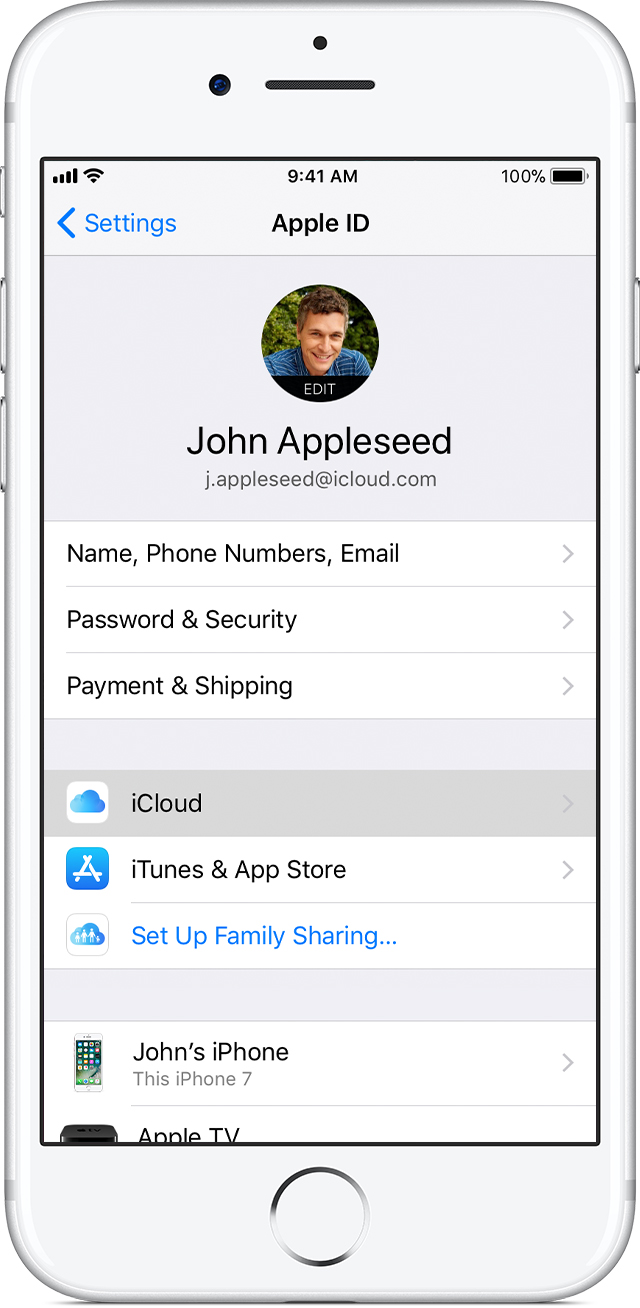
2. Go to Settings > [your name], and tap iCloud. If you’re using iOS 10.2 or earlier, go to Settings, then scroll down and tap iCloud.

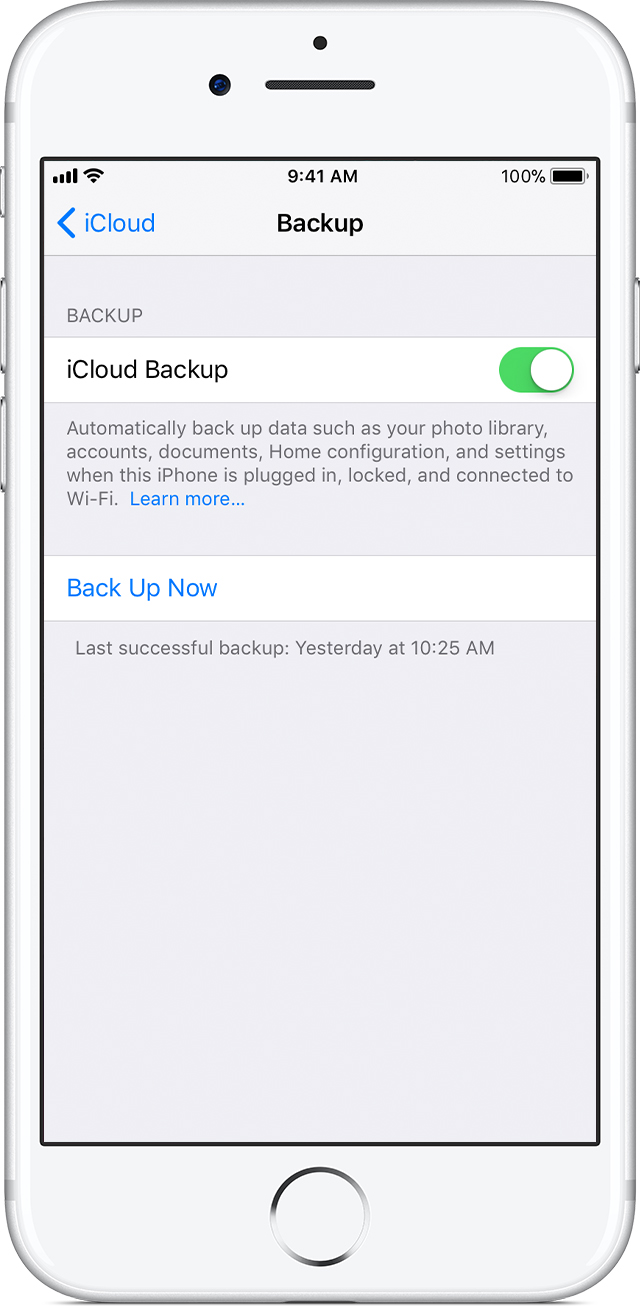
3. Tap iCloud Backup. If you’re using iOS 10.2 or earlier, tap Backup. Make sure that iCloud Backup is turned on.

4. Tap Back Up Now. Stay connected to your Wi-Fi network until the process completes.
You can check the progress and confirm the backup completed. Go to Settings > [your name] > iCloud > iCloud Backup. Under Back Up Now, you’ll see the date and time of your last backup.
Automatically back up with iCloud Backup
To let iCloud automatically back up your device each day, here’s what you need to do:
- Make sure that iCloud Backup is turned on in Settings > [your name] > iCloud > iCloud Backup. If you’re using iOS 10.2 or earlier, go to Settings > iCloud > Backup.
- Connect your device to a power source.
- Connect your device to a Wi-Fi network.
- Make sure that your device’s screen is locked.
- Check that you have enough available space in iCloud for the backup. When you sign in to iCloud, you get 5GB of iCloud storage for free. If you need more iCloud storage, you can buy more from your iPhone, iPad, iPod touch, or Mac.
Plans for iCloud storage are pretty decently priced as well:
50GB: $1.49 p/month
200GB: $4.49 p/month
2TB: $14.99 p/month
How to back up with iTunes
1. Open iTunes and connect your device to your computer.
2. If a message asks for your device pass-code or to Trust This Computer, follow the onscreen steps.
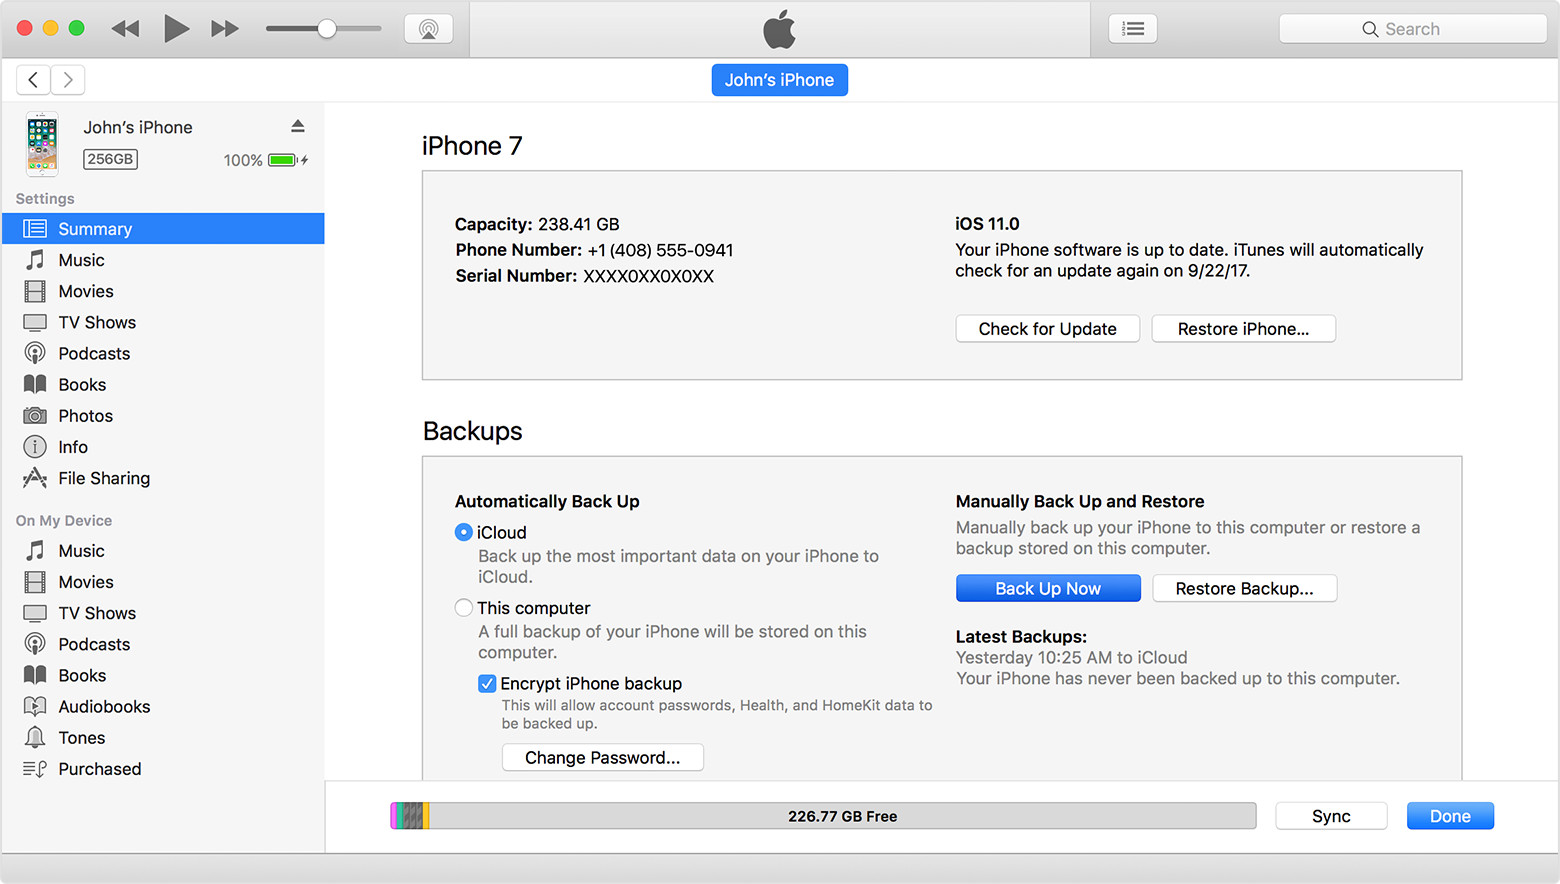
3. Select your iPhone, iPad, or iPod when it appears in iTunes.
4. If you want to save Health and Activity data from your iOS device or Apple Watch, you need to encrypt your backup: Select the box called Encrypt [device] backup and create a memorable password. If you don’t need to save your Health and Activity data, you can make a backup that isn’t encrypted. Just click Back Up Now.

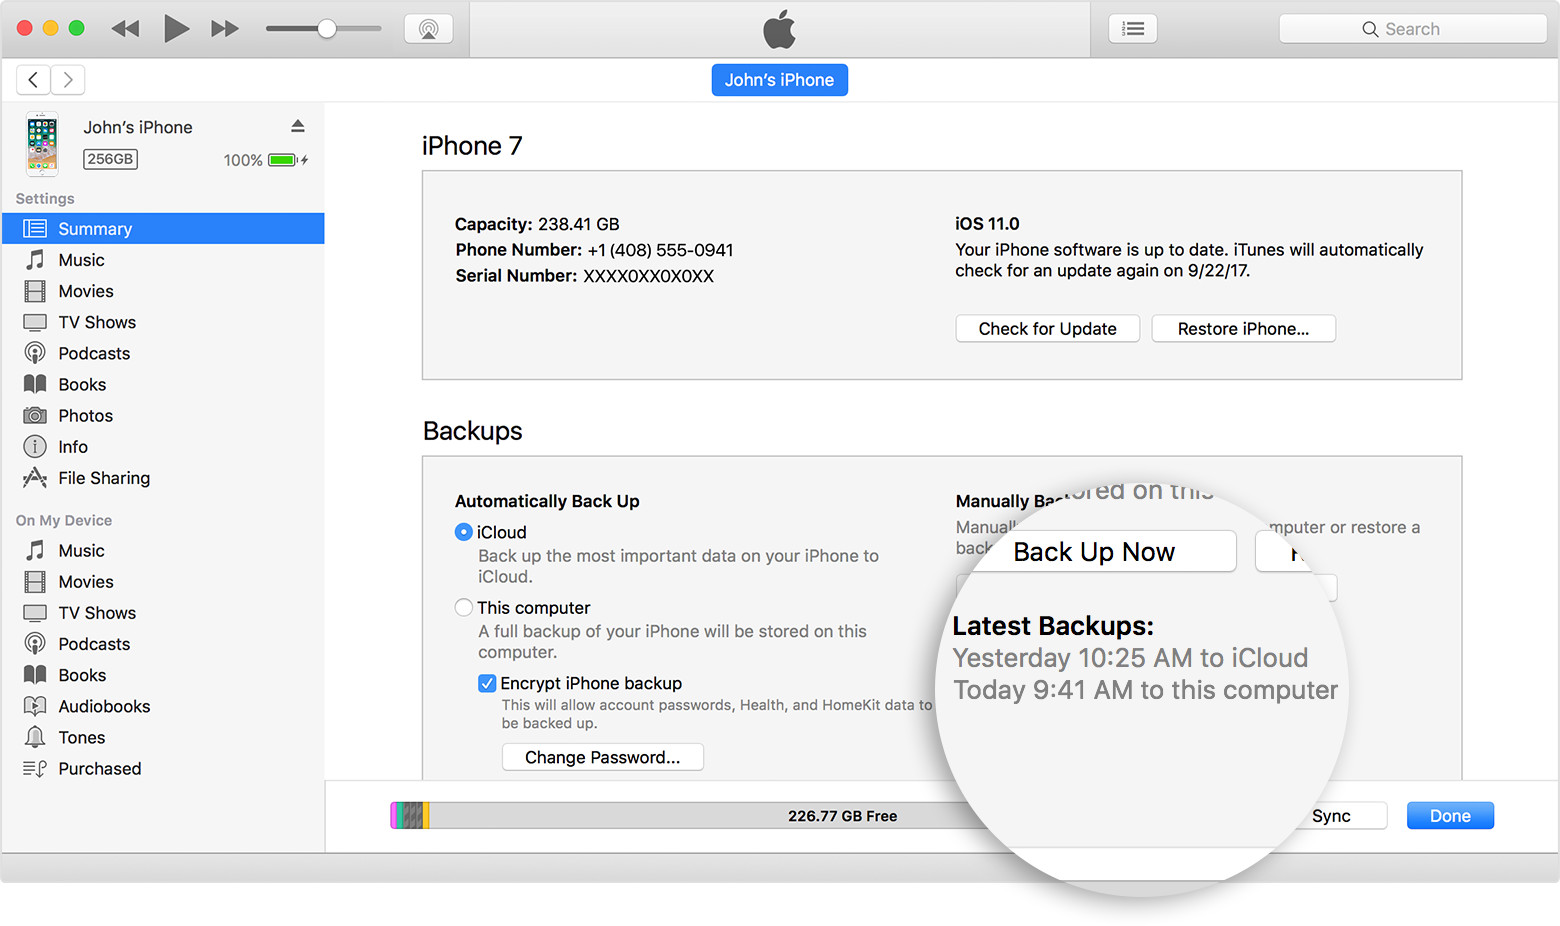
5. When the process ends, you can see if the backup finished successfully on the Summary screen in iTunes. Just look under Latest Backup to find the date and time.

Which one is better?
So which one is better? Backing up via iCloud or to iTunes using a computer or laptop? The reality is that it’s best to be using both.
Having a local back up on your computer is more efficient if you need to restore your device as it’s far less time consuming. When you restore via a local back up you have all your content synced to the device – this includes not only what was backed up, but all your music, podcasts and books. If you’ve backed up via iCloud, you’ll eventually need to sync your device to restore this stuff anyway.
However, if you’re away or for whatever reason don’t have access to your computer and you need to restore your device, then you’re always ready to go with an iCloud backup. This is especially useful if you travel a lot.
By using both ways of backing up your data, you’re always fully protected.


